Reading between the stitches: Demystifying Crochet Pattern Jargon
Do you struggle to make sense of crochet patterns? This blog post is for you! Read on for my top 7 tips for understanding crochet patterns.
Jen Street
7/5/20244 min read
Embarking on a new knitting or crochet project is a bit like diving into a fascinating adventure story that is brimming with creativity and excitement.
But sometimes, reading crochet patterns can feel like you’re reading that adventure story in Martian, especially with all those abbreviations and symbols to decipher!
But fear not! Let me be your language tutor (it’s what I do in my day job after all!)
In this handy guide, I’ll walk you through the process step by step, so you'll feel completely at ease unravelling those patterns.
Crack the Code: Understanding Crochet Pattern Lingo
The first key thing to do is to ensure you understand the pattern lingo. Familiarise yourself with common abbreviations and terminology.
Some are easier than others to understand or make guesses at. For example, ‘ch’ stands for ‘chain’ and ‘st’ stands for ‘stitches’. But others aren’t quite so straight forward. What makes it trickier is that there are differences in American crochet terminology compared to UK crochet terminology. An ‘sc st’ (single crochet stitch) is equivalent to a ‘dc st’ (double crochet stitch) in UK terminology.
If you follow me on social media, you will have been regularly posting explanations of crochet terminology and symbols to help you demystify the language used in crochet patterns and make crochet more accessible to all.
I have collated a handy list of the 6 basic crochet symbols and their terminology in both UK and US terms for you to download. Print this off and keep it somewhere safe to refer back to when working on your next project!
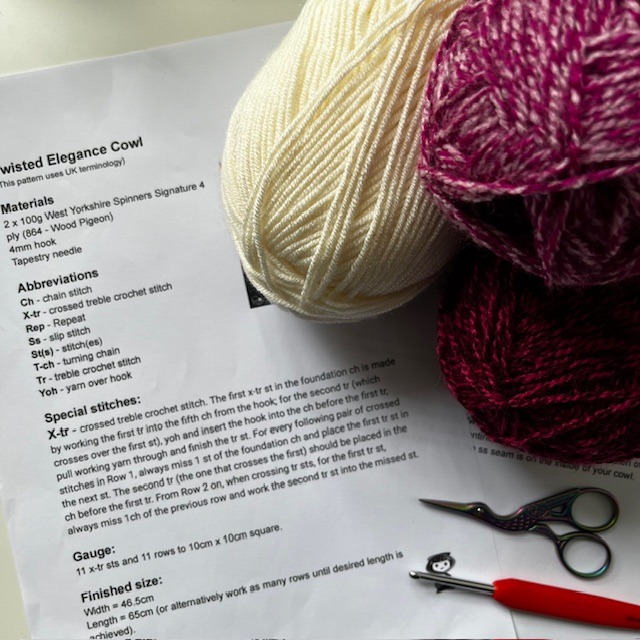
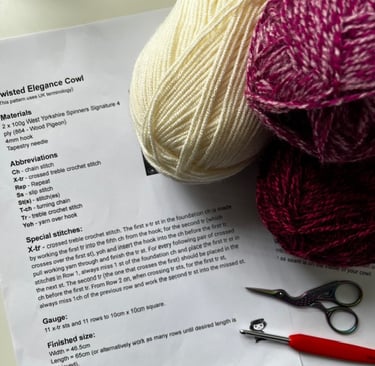
Get Ready: Understanding Materials
Just like when you’re cooking or baking, you need to make sure that you have everything required before you start. Look for the materials section at the beginning of the pattern. Here, it will list the yarn, hook size and any other supplies you might need to complete the project. While everyone crochets differently, it’s a good idea to stick as close as you can to the materials listed in the pattern. Yarn weights do make a dramatic difference to the size of the finished project and there will be a whole host of reasons why a designer chose the yarn they list in their pattern.
Sometimes though, substitutions are unavoidable, particularly if you can’t get hold of the specific yarn listed. If you are going to substitute the yarn for a different one, make sure that it is similar in weight before you start otherwise your project can end up looking very different to the one in the picture.
If you’re not sure whether you’ve chosen a suitable substitution, it’s a good idea to ask at your local yarn store for some advice, or alternatively reach out to the pattern designer themselves.
Designers are often all too happy to help makers who have bought their patterns because they want you to have the best experience of their pattern.
Similarly, making sure that you use the correct hook size too, will have a big impact on the end result.
Measure up: Understanding gauge
Gauge refers to the number of stitches and rows achieved with the specified yarn and hook size per 4 inches or 10cm.
Most patterns will include instructions for working up a gauge or tension swatch as well as how to measure it. Whilst it can be really tempting to skip this section and jump straight into the project with gusto, all that gung-ho enthusiasm isn’t going to help you out when the going gets rough.
Take it slow and steady at the start - it’s crucial to match the gauge in the pattern to ensure your finished project turns out the correct size and avoid disappointment at the end.
To do this, I recommend investing in a tension square - this bit of kit is invaluable in making measuring up easier.
Crafting Success: The Importance of Reading Pattern Instructions
I confess I don’t always take my own advice with this, I tend to wing it and have, in the past, been guilty of running headlong into projects without taking due care and attention over the instructions. However, I strongly advise you not to do this when you’re starting out. Crochet can be a lot like putting together flat pack furniture. It rarely goes to plan when you don’t follow the instructions!
So, my advice is to read the pattern instructions through, from start to finish and make a note/highlight any special stitches or techniques that are mentioned.
Make sure that you know what these special stitches or techniques are before you start. You wouldn’t start building the furniture if you didn't have the necessary tools or the know-how right?
It doesn’t hurt to practise special stitches or techniques beforehand so that your finished project is the best it can be. Remember, each pattern or project is an opportunity for you to learn and build on your existing skill set, so make the most of the opportunity and practise.
It’s in the practice that we see the progress!
Master of Repetition
Many patterns include repeat sections, where a sequence of stitches are repeated multiple times. It’s really important that you pay close attention to these instructions when working on them - I’d recommend highlighting them so that they really stand out to avoid making mistakes.
Clarity is key
On reading through the pattern, if you encounter any sections that are confusing or unclear, don’t hesitate to seek clarification. You can reach out to the pattern designer themselves, the publisher responsible for the book or magazine or you could consult online forums and crafting communities for help and advice.
Finishing Touches: Completing your project with flair
Once you’ve completed all the instructions, follow any finishing steps provided in the patterns, such as weaving in ends or blocking your project. These are really important because they help to give your finished project a professional touch.
Finally, step back and admire your handiwork! Share your completed project with pride and shout about your accomplishments from the rooftops, whether it’s on social media, in your local crochet group or simply with friends and family.
By following these steps, you’ll be well-equipped to tackle any crochet pattern with confidence. Remember though, when you’re just starting out, those mistakes are an important part of the process. It’s only through making those do we learn and improve. FAIL stands for First Attempt In Learning after all!
Hook your handy help sheet of crochet symbols and terms in colour or in black and white.
Book a one to one session with me.
Browse my patterns - visit my Ravelry Store.
And don’t forget to tag me when you’re showing off your finished piece of work. I'm @stitchstreetcrochet on Instagram and @stitchstreet on Facebook.
I’d love to see what you have made!
Thanks for reading,
Jen x